This page contains some affiliate links. Please review my disclosure policy.
Looking to learn how to make bar soap? It’s easier than you think! In this step-by-step guide I’ll show you how to make homemade soap using simple melt and pour soap and ingredients that benefit all skin types but especially sensitive skin!
Now I’m not gonna lie, for most of my life I used a liquid body wash, but as you guys know I’ve spent the last several years trying (emphasis on trying!) to make more sustainable choices and one of those simple swaps was to switch from liquid body wash to bar soap.
I actually got into soapmaking a few years ago as a budget saving activity and creative outlet. Some of you may remember that Lee and I used to run a DIY blog called SHEuncovered (RIP!) and I shared many a bar soap recipes over there. Because despite common beliefs, homemade soap is actually VERY easy! That’s because of one key ingredient: melt and pour soap.
Easy Hack= Melt + Pour Soap
While I love the idea of cold process soap-making from scratch, I’m also completely intimidated by it. From what I understand, to make soap from scratch it requires a chemical reaction using lye. Now I don’t believe it’s actually all that hard anything requiring me to wear safety goggles, rubber gloves and avoid fumes is just not my jam. I prefer to use the easier option of melt and pour soap as my soap base.
What is melt + pour soap? It’s basically a beginner soap that has already been premixed and hardened into a block. Of course, you can use it as is but it can also be melted back down and ingredients added to it to make the soap mix you desire. In this case we added ingredients that are nourishing and moisturizing for a sensitive skin..
There are MANY types of melt + pour soap. Some things to look out for:
- Make sure it is free of parabens, preservatives, and PEG
- SLS free IF you have sensitive skin (it’s a known skin irritant)
- NO added coloring
- Added fragrance oil (essential oils CAN be fine but some people with sensitive skin may still react to their scents).
For sensitive skin look for products with:
- shea butter
- goat’s milk
- cocoa butter
- coconut oil (some people are still sensitive to this)
What You Need to Make Bar Soap
So let’s chat about what you need to make this homemade bar soap:
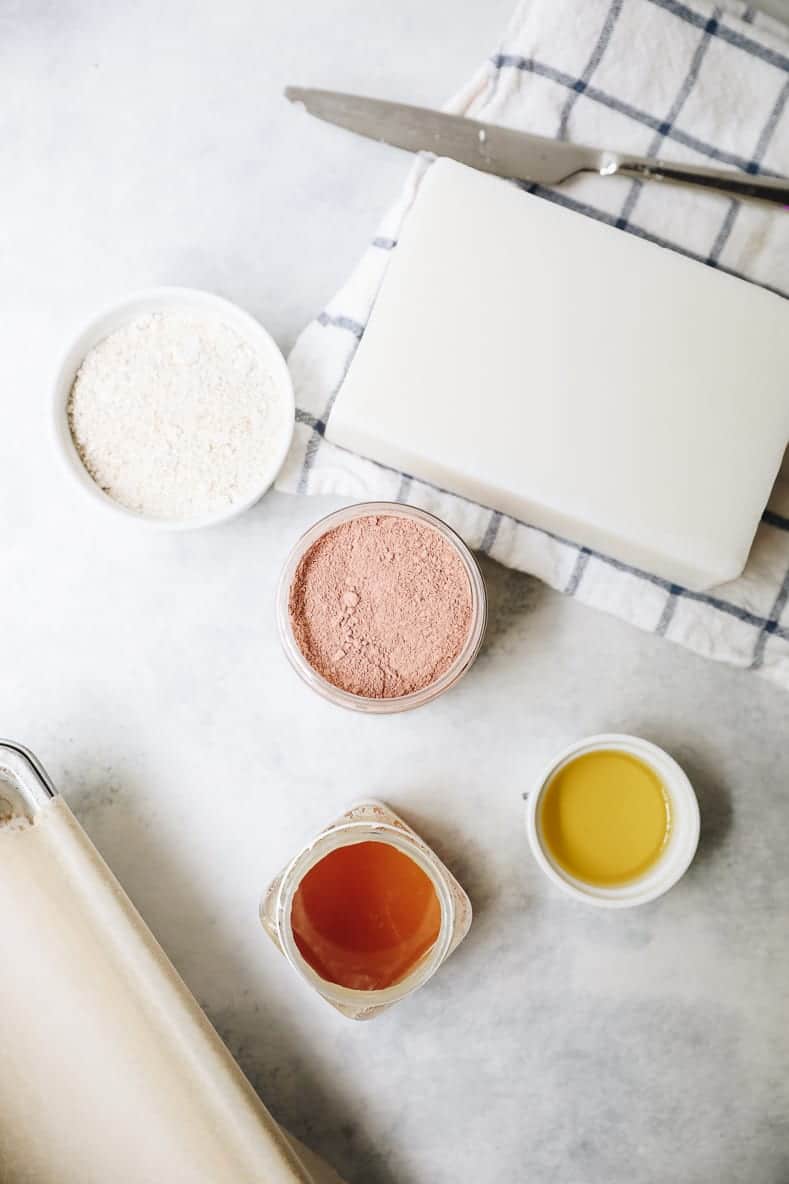
- Melt + Pour Soap: See above for what to lookout for – I use goat milk soap.
- Oat Flour (colloidal oatmeal): Can buy pre-made oat flour or blend up rolled oats in your blender until a fine texture is reached.
- Pink Clay: Can help reduce inflammation and irritation on the skin. Also great for acne.
- Raw Honey: A natural exfoliator but also super antibacterial so great for preventing acne. Honey soap has long been used for sensitive skin.
- Jojoba Oil: Jojoba oil is a great moisturizing oil for sensitive skin. It Is hydrating but non-comedogenic so won’t clog pores. Olive oil or almond oil works in place if you don’t have jojoba oil.
The process is slightly easier with a soap mold (typically a silicone mold), but I lost mine somewhere in the move and a loaf pan will do just fine. Line it with parchment paper to prevent sticking.
How to Make Bar Soap [Step-By-Step]
For those of you who have never made your own soap before, I am going to walk you through the process. I promise it is easier than you think!
STEP 1: PREP INGREDIENTS
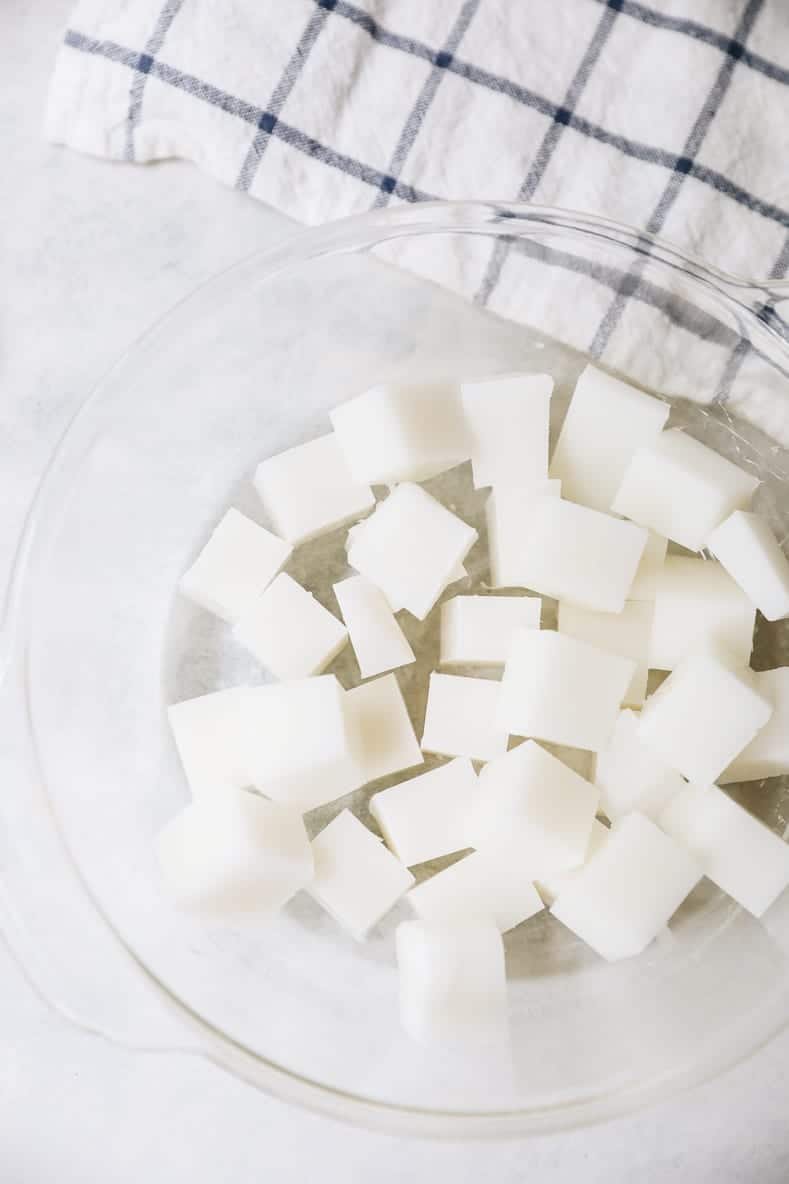
Gather and measure out all of your ingredients. Cut your melt + pour soap into small cubes (recipe calls for 1 lb which is half of a traditional 2 lb block). No need to measure, just estimate half. If you don’t have a silicone soap mold, line a loaf pan with parchment paper.
STEP 2: MELT SOAP
Melt your soap in the microwave in 30 second intervals, stirring in between OR make a double boiler in a stainless steel pot on the stove top. I use the double boiler method and it will take about 10 minutes for your soap to melt. It is much faster in the microwave but make sure you don’t burn it.
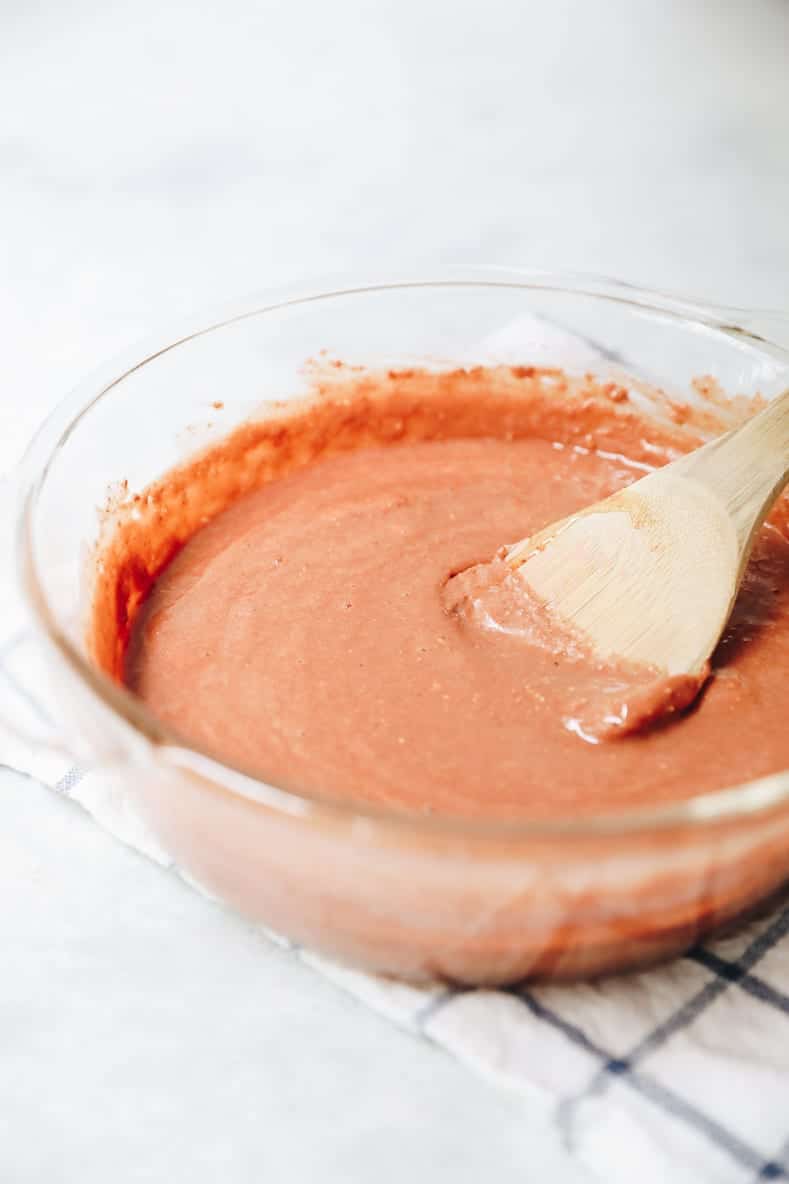
STEP 3: STIR IN ALL INGREDIENTS
Once soap is fully melted, stir in all of the ingredients (oats, clay, honey and jojoba oil) and mix with a spoon or spatula until soap mixture is well combined.
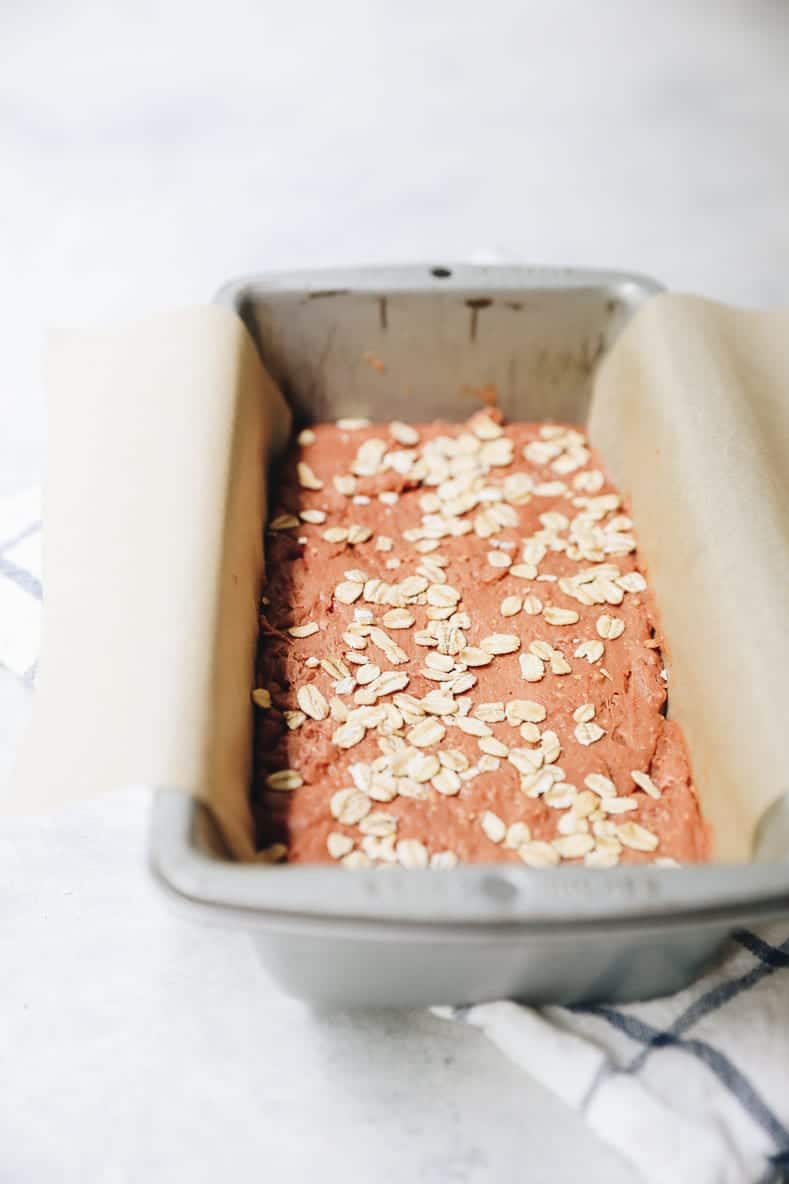
STEP 4: POUR INTO MOLD
Pour your soap batter into your mold and smack against the counter a couple times to release any air bubbles. Top with rolled oats, if personal preference. Allow to sit for a few hours to harden (or place in the refrigerator for 1 hour if in a rush).
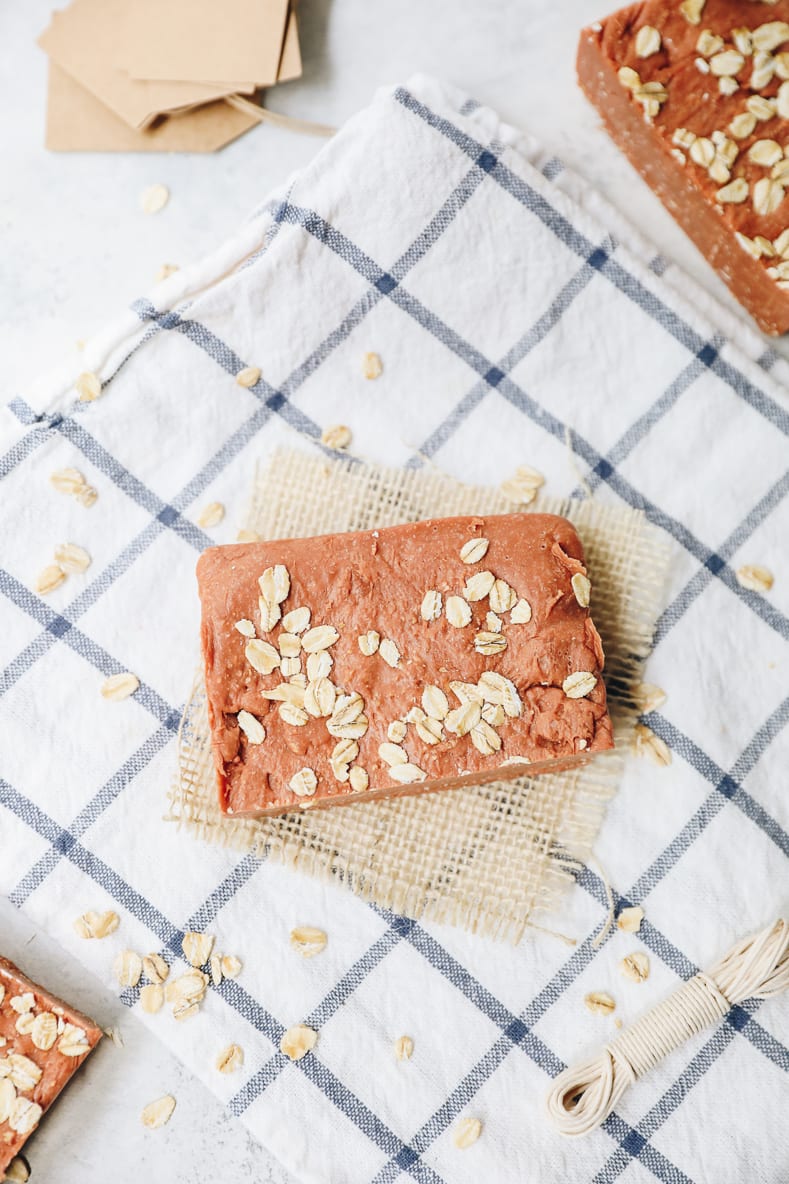
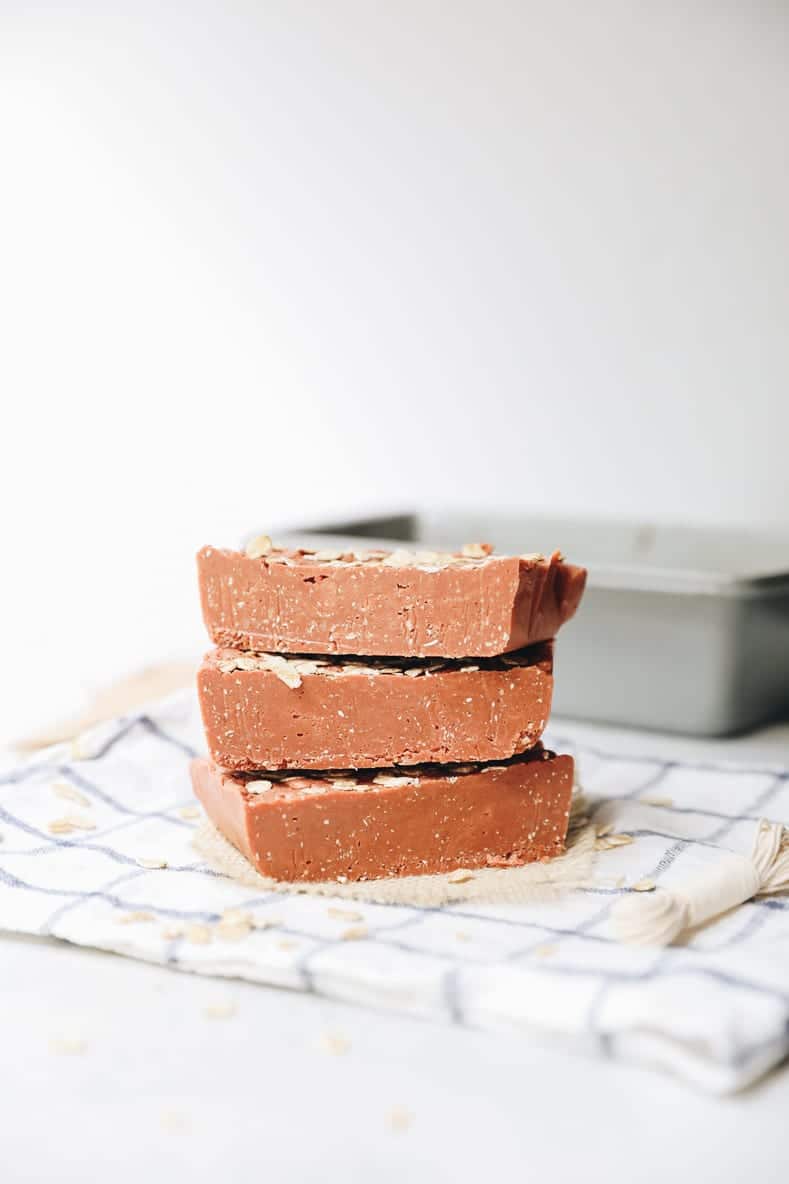
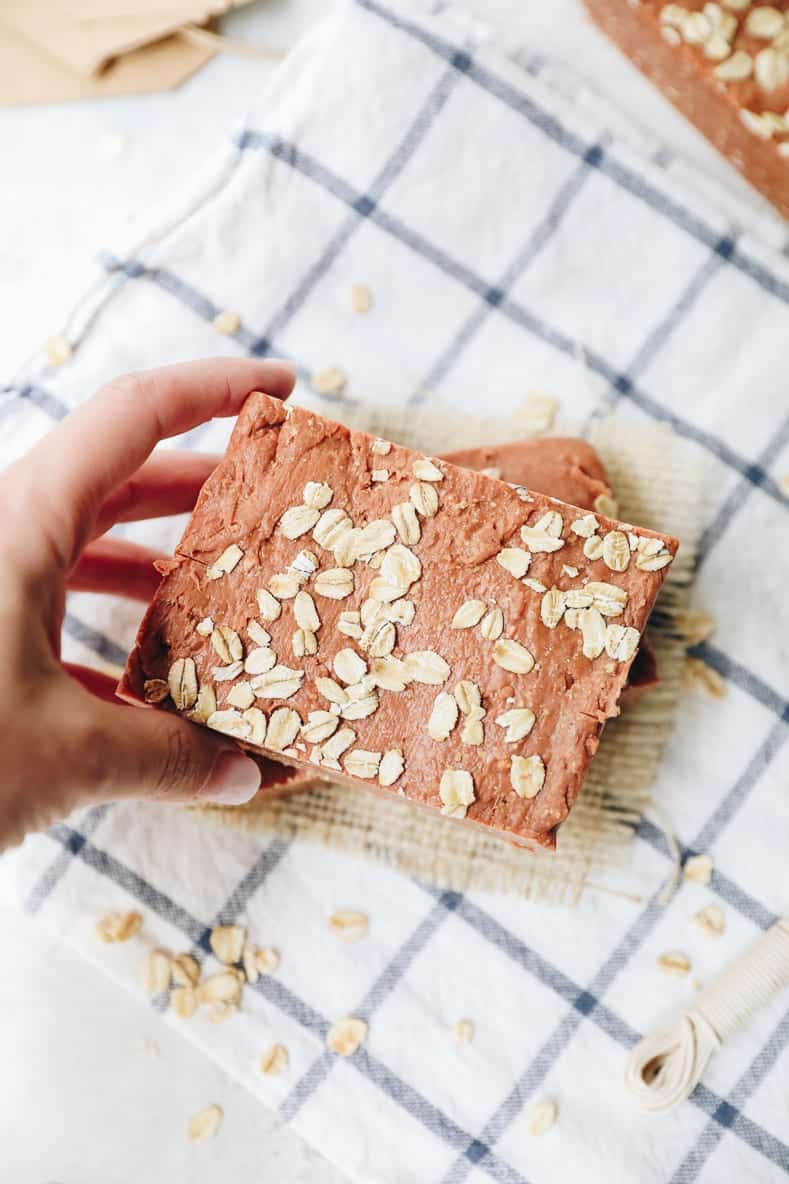
STEP 5: CUT INTO PIECES
Cut your soap into desired pieces. A soap mold can usually do about 6-8 small pieces or in a loaf pan you can usually get about 3-4 bigger pieces. Store your soap in a paper bag in a dark place indefinitely. They will not go bad.
How Long Does This Bar Soap Last?
1 bar of soap will usually last several months for us (for 2 people in the shower) so this recipe can honestly make enough bar soap for at least a year.
Is This Soap Antibacterial?
Yes, this soap is antibacterial (if using the recommended melt and pour soap) though the CDC is still recommending liquid pump soap for washing your hands. Keep this bar soap in the shower and lather your body in place of liquid body wash or store-bought soaps.
Hopefully this can show you that making homemade bar soap is not that hard and can be both customizable and economical! Let me know when your make your first batch!
More Homemade DIYs You Might Enjoy:
- How to Make Homemade Rosewater
- DIY Salt Scrub Recipe
- How to Make Aromatherapy Candles
- How to Make Homemade Deodorant
- DIY Lip Scrub Recipe
- Moisturizing Avocado Face Mask
- Homemade Bath Salts
How To Make Bar Soap
Looking to learn how to make homemade bar soap? It’s easier than you think! In this step-by-step guide I’ll show you how to make homemade bar soap using simple melt and pour soap and ingredients that benefit all skin types but especially sensitive skin!
- Prep Time: 2 minutes
- Cook Time: 10 minutes
- Total Time: 12 minutes
- Yield: 4–8 bars of soap 1x
Ingredients
- 1 lb melt and pour soap (cut into small cubes)
- 1/2 cup of oat flour
- 2 tbsp pink clay
- 1 tbsp raw honey
- 2 tbsp jojoba oil (olive oil will work too)
Instructions
- Gather and measure out all of your ingredients. If you don’t have a silicone soap mold, line a loaf pan with parchment paper.
- Melt your soap in the microwave in 30 second intervals, stirring in between OR make a double boiler on the stove top. If using the double boiler method it will take about 10 minutes for your soap to melt. It is much faster in the microwave but make sure you don’t burn it.
- Once soap is fully melted, stir in all of the ingredients (oats, clay, honey and jojoba oil) until well combined.
- Pour your soap batter into your mold and smack against the counter a couple times to release any air bubbles. Top with rolled oats, if desired. Allow to sit for a few hours to harden (or place in the refrigerator for 1 hour if in a rush).
- Cut your soap into desired pieces. A soap mold can usually do about 6-8 small pieces or in a loaf pan you can usually get about 3-4 bigger pieces.
- Store your soap in a paper bag in a dark place indefinitely. They will not go bad.


Hi i have watch all that you have posted i love your receipes and would like to get started make soap , would you help me to get the ingredints please . I know i will have to pay thank you
Is there any nice scents I can add to this mixture for people who do not have skin irritations of course? I love clean fresh scents for my shower soaps.
Thanks for sharing this recipe.
you could certainly use something like peppermint or eucalyptus essential oils!
Can you use any scents other than eucalyptus or peppermint?
Do you mind telling me if you need the pink clay please? I have all the other ingredients!